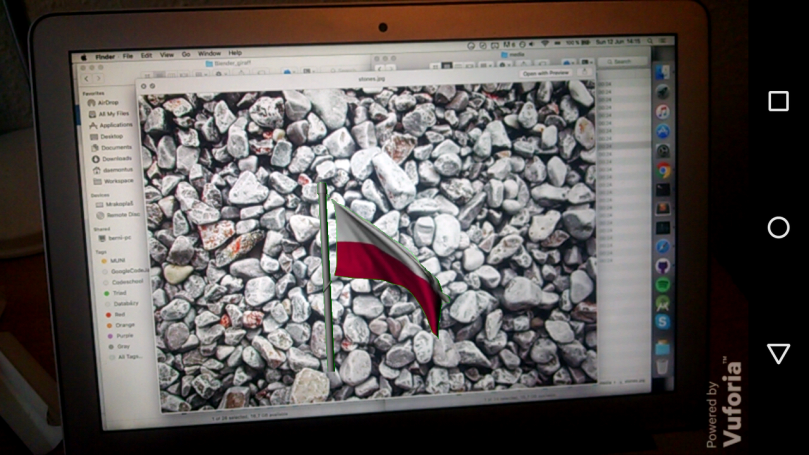
Making simple, yet interesting AR/VR apps tends to get a little overcomplicated, especially when 3D is involved. Vuforia nicely handles the VR/AR part, but if you need to render some non-trivial 3D models, you usually have to rely on Unity, which can get expensive and complicated really fast (And usually requires some quality time with C++ and NDK). Therefore in this text I’d like to describe how to use LibGDX – a nice, simple game engine – to render 3D models together with Vuforia.
If you aren’t interested in the how-s, you can also skip right to the example github repo.
3D Model
Before you start coding (or after, I don’t care, I’m not your boss), you need to prepare the model you’d like to render. In general, LibGDX is quite powerful, however, there are some limitations.
First, you are going to need your model as FBX file and convert it into the G3DB/G3DJ format (See LibGDX tutorial on how to handle this). There is a ton of free models on the internet and most of them can be used without an issue, however, make sure that:
- The model isn’t too big: On modern devices, you can usually afford to go as far as 20-30MB models. However, if you aren’t targeting the latest hardware, it’s usually safer to stick to something in the <10MB category.
- The G3DB format supports only 32k vertices per mesh. If you have a big complex model, it usually has to be split into multiple meshes.
- The textures have to be PNG or JPEG. A lot of models come with TGA textures. You have to convert these to something LibGDX can read.
- Make sure that there are no corrupted/missing textures. Best way to do this is to convert the model to G3DJ format, open it is some text editor and at the end of the file check the materials section for any weird stuff.
- The conversion utility is sometimes little buggy, if it’s not working as you expect (especially with materials), try fiddling with the export settings in your 3D editor (not really my area of expertise).
- Usually you are going to need to rotate/scale the model to fit the coordinate system of LibGDX and your recognition target size. You can do this in code (good for “debugging” models), however it has to be done for each frame, so it might be a good idea to do it beforehand in some editor in order not to sacrifice performance.
If everything goes well, you should end up with a G3DB model and possibly some texture JPEG/PNG files in your assets folder.
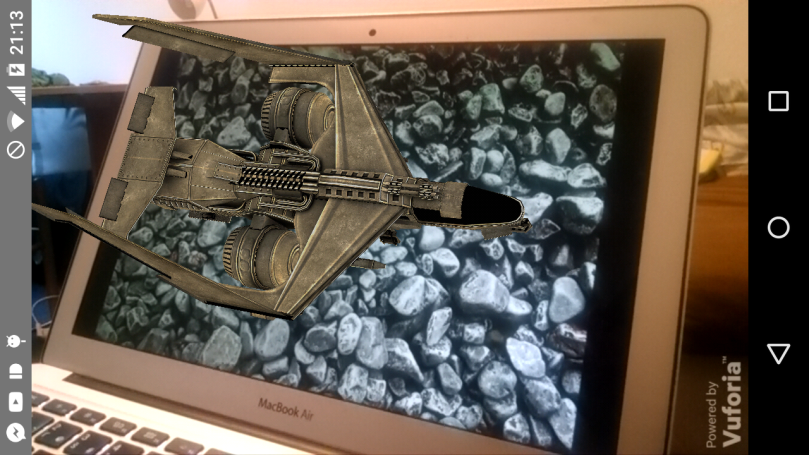
For this example, we are going to use this model of a combat jet.
Integration
We would like to separate Vuforia and LibGDX as much as possible. We can’t make them completely independent, since they have to synchronise on frame rendering and use the same View after all. As far as I can tell, it is also kind of hard to interfere with the LibGDX rendering loop. Therefore we are going to leave the main render loop in hands of LibGDX and render Vuforia content from there.
First, let’s look at the Vuforia related code.
It is located in the ar.vuforia package in the example project and contains pretty much standard Vuforia integration. The fun stuff happens in the VuforiaRenderer class. Standard Vuforia renderers usually implement GLSurfaceView.Renderer. We are not going to use this interface, because the renderer will be called from LibGDX. Instead, we define a processFrame method that is going to render the camera background and return the recognised targets back to LibGDX.
Next we have a look at the LibGDX code.
It is located in the ar.libgdx package and is also based on one of the examples. The key change is that both Display and Engine classes have access to the VuforiaRenderer and are responsible for calling the appropriate methods such as initRendering and surfaceChanged when needed.
Apart from this, the only thing happening in Engine and Display is model loading. It happens on the main thread, which of course will freeze your app. In real life, you will have to load the models on background using some dedicated loading screen. We don’t bother with this here, for simplicity. It is also a good idea to specify in the manifest that your app requires larger heap:
android:largeHeap="true"
A 10MB model can easily take up as much as 100MB of RAM while standard Android heap sizes are usually just around 64MB.
Finally, the place where all of this comes together is the LibGDX Renderer class. In the constructor, we prepare the render environment – lights, camera and model renderer. More about this stuff can be found in any good LibGDX tutorial.
With the environment ready, we can start rendering frames. First, Vuforia renderer is called to render camera background and return recognised targets. We then use these targets to update the camera position. The idea is that the model stays at it’s initial position while the camera moves around it and creates the AR illusion (if no target is recognised, the camera is pointed away from the model).
The only problem is that LibGDX and Vuforia use different matrix representations for position (and it also depends on which physical camera is being used – front or back). We have to swap the first two columns and then in order to obtain correct camera position perform a transposition and inversion of the matrix. Finally we can use this data to update camera location.
Here we can also update the model scale/rotation if necessary.
All of this is then integrated together in the ArActivity, which is again a pretty standard merge of the LibGDX and Vuforia example activities.
And that’s it. The example code can use some polishing (feel free to make pull requests), but should provide you with a good starting point when creating simple yet powerful AR/VR apps. If you have any question, you can hopefully catch me in the comments.
Troubleshooting
If your model is not visible, first check that it has the right scale and orientation.
If the model is too big, the camera will get inside of it and nothing will be visible. Similarly, if the model is too small, you won’t be able to see it. Experiment with different scaling factors.
If your model is only partially visible, try changing the visibility distance (camera.far property). Depending on scale, sometimes your model will be cut out because it is too far.
In case of weird/missing materials, check the G3DJ file and look if the materials there correspond to what you would expect. Also make sure there is a proper lighting in the scene.
Some references:
forum1, forum2 and stack overflow